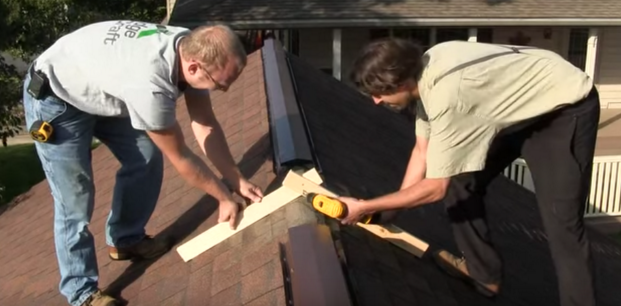
First, find and mark the center of your roof. If your cupola base is 30”, measure 15” on either side of the center line. (If the base is 48” you would measure 24” on each side and so on.) Cut and remove the section of ridge vent or cap where the cupola will sit on your roof.
Next, screw together the 1” x 3” pieces to make an angle jig that you will use as a template for your cupola base. Put only one screw in at first so you can pivot the pieces. Put the boards firmly onto each side of the roof, then secure with a second screw, as shown below.

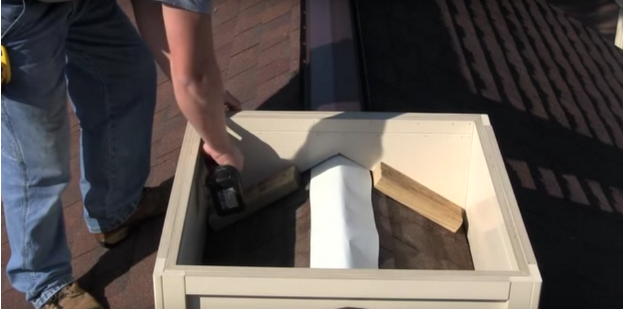
Position the cupola base on your roof and make sure that it fits properly and sits level.
Cut 4 pressure-treated 2” x 4” blocks to be installed on the inside of the cupola base. (You may need to cut them according to the size of the cupola base.) Install them using 3” screws or lags as shown below.

Attach the base to the blocks placing the 2” screws provided through the outside of the base and into the side of the block. Use two (2) screws per block.
Finally, use a clear silicone to caulk the base of the cupola.
The cupola sections are very simple to assemble. Simply place the midsection on top of the base and attach with the 2” screws provided, using the pre-drilled holes. Then place the roof on the midsection and fasten with screws, again using the pre-drilled holes.
For over 15 years, we have been helping customers find the cupolas of their dreams. From gazebo cupolas to custom designs , we guarantee to match you with a cupola you’ll love.
For quality and prices you can’t beat, call Valley Forge Cupolas at 1-866-400-1776.